analitics

Pages

Thursday, August 17, 2017

The Google Cloud SDK - part 001 .

This tutorial will cover this steps into development with Google Cloud SDK and Python version 2.7:

  • install the Google Cloud SDK on the computer;
  • make settings online for your Google project to use Google Cloud SDK;
  • run the online project of Google Cloud SDK;
  • make setting into your computer to run the local project ;

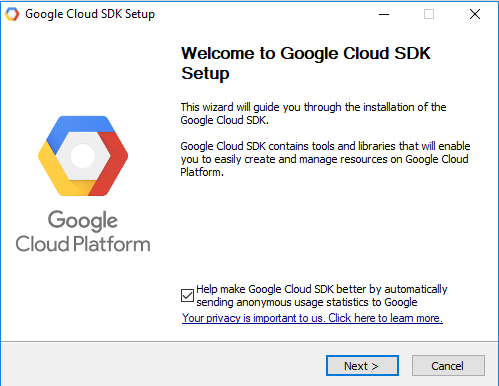
First, you need to download the Google Cloud SDK and run it.


After GUI install a window command will ask you to set the default project for your work.
Welcome to the Google Cloud SDK! Run "gcloud -h" to get the list of available commands.
---
Welcome! This command will take you through the configuration of gcloud.

Your current configuration has been set to: [default]

You can skip diagnostics next time by using the following flag:
  gcloud init --skip-diagnostics

Network diagnostic detects and fixes local network connection issues.
Checking network connection...done.
Reachability Check passed.
Network diagnostic (1/1 checks) passed.

You must log in to continue. Would you like to log in (Y/n)?  Y
...
The next step is to start online to deploying a Hello World app with: Deploy a Hello World app:

This will start an online tutorial into the right area of the screen with all commands and steps for your Google Cloud SDK online project.
Follow this steps and in the end will see how the online Google Cloud SDK project will show: Hello, World! into your browser.
The next step is to make a local project and run it.
You can use the python docs sample from GoogleCloudPlatform but is not the same with the online example.
To download the GoogleCloudPlatform sample use git command:
C:\Python27>git clone https://github.com/GoogleCloudPlatform/python-docs-samples
Cloning into 'python-docs-samples'...
remote: Counting objects: 12126, done.
remote: Compressing objects: 100% (16/16), done.
remote: Total 12126 (delta 1), reused 10 (delta 1), pack-reused 12106
Receiving objects: 100% (12126/12126), 3.37 MiB | 359.00 KiB/s, done.
Resolving deltas: 100% (6408/6408), done.

C:\Python27>cd python-docs-samples/appengine/standard/hello_world
To start this sample into your google project you need to use this:
C:\Python27\python-docs-samples\appengine\standard\hello_world>gcloud app deploy app.yaml --project encoded-metrics-147522
Services to deploy:

descriptor:      [C:\Python27\python-docs-samples\appengine\standard\hello_world\app.yaml]
source:          [C:\Python27\python-docs-samples\appengine\standard\hello_world]
target project:  [encoded-metrics-147522]
target service:  [default]
target version:  [20170817t234925]
target url:      [https://encoded-metrics-147522.appspot.com]


Do you want to continue (Y/n)?  Y

Beginning deployment of service [default]...
#============================================================#
#= Uploading 5 files to Google Cloud Storage                =#
#============================================================#
File upload done.
Updating service [default]...done.
Waiting for operation [apps/encoded-metrics-147522/operations/XXXXXX] to complete...done.
Updating service [default]...done.
Deployed service [default] to [https://XXXXXX.appspot.com]

You can stream logs from the command line by running:
  $ gcloud app logs tail -s default

To view your application in the web browser run:
  $ gcloud app browse

C:\Python27\python-docs-samples\appengine\standard\hello_world>gcloud app browse
Opening [https://XXXXXX.appspot.com] in a new tab in your default browser.

C:\Python27\python-docs-samples\appengine\standard\hello_world>
This will start your application with the text - Hello, World! into your browser address bar with this web address: XXXXXX.appspot.com.


Wednesday, August 16, 2017

The DreamPie - interactive shell .

The DreamPie was designed to bring you a great interactive shell Python experience.
There are two ways to install the DreamPie:
  • cloning the git repository;
  • downloading a release.
You can read about installation and download here.
To run it just try the dreampie.exe with your python shell, I used with my python 2.7 version:
C:\DreamPie>dreampie.exe --hide-console-window c:\Python27\python.exe
Let's see one screenshot of this running command:

Also, I tested with Python 3.6.2 and works well.
The main window is divided into the history box and the code box.
The history box lets you view previous commands and their output.
The code box for writing your code.
Some keys I used:

  • Ctr+Enter - run the code;
  • Ctr+up / down arrow - adds the previous / next source code;
  • Ctr+Space - show code completions;
  • Ctr+T - open a new tab code;
  • Ctr+W - close the tab code;
  • Ctr+S - save your work history into HTML file.

You can set your font, colors and many features.
I make the installation into C:\DreamPie folder, and comes with all these folders and files:
C:\DreamPie>tree
Folder PATH listing for volume free-tutorials
Volume serial number is 000000FF 0EB1:091D
C:.
├───data
│   ├───language-specs
│   ├───subp-py2
│   │   └───dreampielib
│   │       ├───common
│   │       └───subprocess
│   └───subp-py3
│       └───dreampielib
│           ├───common
│           └───subprocess
├───gtk-2.0
│   ├───cairo
│   ├───gio
│   ├───glib
│   ├───gobject
│   ├───gtk
│   └───runtime
│       ├───bin
│       ├───etc
│       │   ├───bash_completion.d
│       │   ├───fonts
│       │   ├───gtk-2.0
│       │   └───pango
│       ├───lib
│       │   ├───gdk-pixbuf-2.0
│       │   │   └───2.10.0
│       │   │       └───loaders
│       │   ├───glib-2.0
│       │   │   └───include
│       │   └───gtk-2.0
│       │       ├───2.10.0
│       │       │   └───engines
│       │       ├───include
│       │       └───modules
│       └───share
│           ├───aclocal
│           ├───dtds
│           ├───glib-2.0
│           │   ├───gdb
│           │   ├───gettext
│           │   │   └───po
│           │   └───schemas
│           ├───gtk-2.0
│           ├───gtksourceview-2.0
│           │   ├───language-specs
│           │   └───styles
│           ├───icon-naming-utils
│           ├───themes
│           │   ├───Default
│           │   │   └───gtk-2.0-key
│           │   ├───Emacs
│           │   │   └───gtk-2.0-key
│           │   ├───MS-Windows
│           │   │   └───gtk-2.0
│           │   └───Raleigh
│           │       └───gtk-2.0
│           └───xml
│               └───libglade
└───share
    ├───applications
    ├───man
    │   └───man1
    └───pixmaps